eOrganic author:
Tim Coolong, University of Kentucky
Introduction
High tunnels are becoming increasingly popular for use by small farms who often market directly to consumers. Although they have proven to be economically advantageous to farmers who wish to capitalize on high prices obtained either early or late in the growing season, permanent high tunnel structures do represent a significant capital investment. The cost for a standard size tunnel, including plastic (two layers) and all the materials required for construction can range from $1.50-$2.50 per square foot without labor and freight charges. This represents an initial investment of several thousand dollars, which is simply too much for some small farms. Although most growers are able to pay for their tunnels within a few growing seasons, others cannot justify the investment. For this reason, extension and research personnel at the University of Kentucky have been working on developing a low cost high tunnel covered with a single layer of plastic that can be assembled or moved in an afternoon.
Watch the High Tunnel Production and Low Cost Tunnel Construction Webinar »
This low cost high tunnel only provides about 3 oF in frost protection, compared to 7 oF for a double poly tunnel. This tunnel design has proven to withstand 60 mph winds with little damage in central and western KY. This tunnel will not withstand much more than a very light snow event (<1 inch), however it is not meant to be used through the winter in parts of the country that receive significant snowfall. The best time to use this tunnel is for a few months in early spring and mid-fall that receive low daily temperatures and mild frosts. Demonstrations in Central and Eastern KY have shown that growers can reach the market up to three-four weeks earlier with tomatoes grown in this tunnel than in the field. The added income from these early tomatoes more than offsets the initial costs.
Additional benefits from this type of design include the ability to make the tunnel as long as is necessary. Because much of the labor is in constructing the endwalls, there is not as much difference in labor costs for constructing a 300 foot long tunnel compared to a 100 foot long tunnel. Obviously materials costs are more, but it allows flexibility for the grower depending on market conditions. Another positive for organic growers in particular is the ability to easily disassemble the tunnel and move it from one location to another. One of the central tenets of organic agriculture is the idea of crop rotation. Unfortunately with some of the more permanent high tunnel structures proper rotation is difficult. Often growers find themselves growing the same crop in the same location for many years. Failure to rotate annual crops does not comply with organic requirements, and in many cases results in high levels of soil-borne diseases. Organic growers in particular have had to adapt to find creative ways to deal with these diseases, including grafting of resistant rootstocks, biofumigants, and soil solarization. Being able to quickly move a tunnel allows growers to easily rotate and avoids many of these problems. The following are step-by-step instructions on how to assemble this type of tunnel. This design is constantly being modified to find the most economical use of money and labor while still providing a sturdy useful structure. Below is a detailed outline on how to construct this tunnel.
Constructing the high tunnel
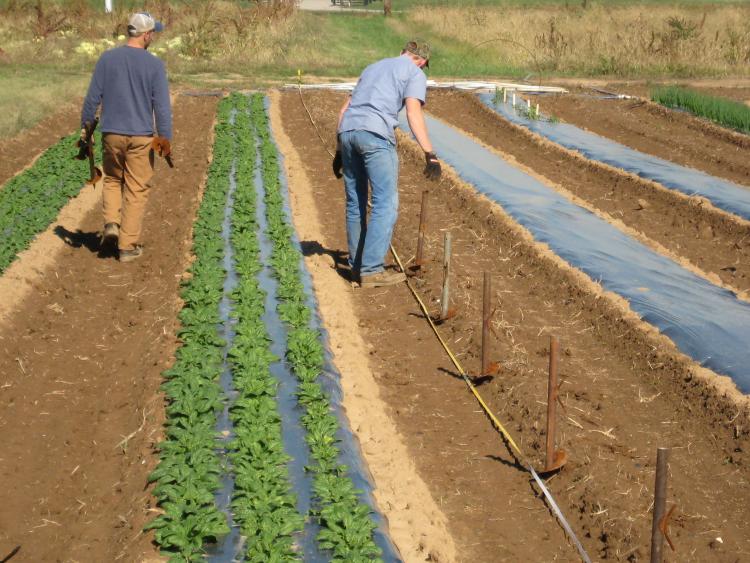
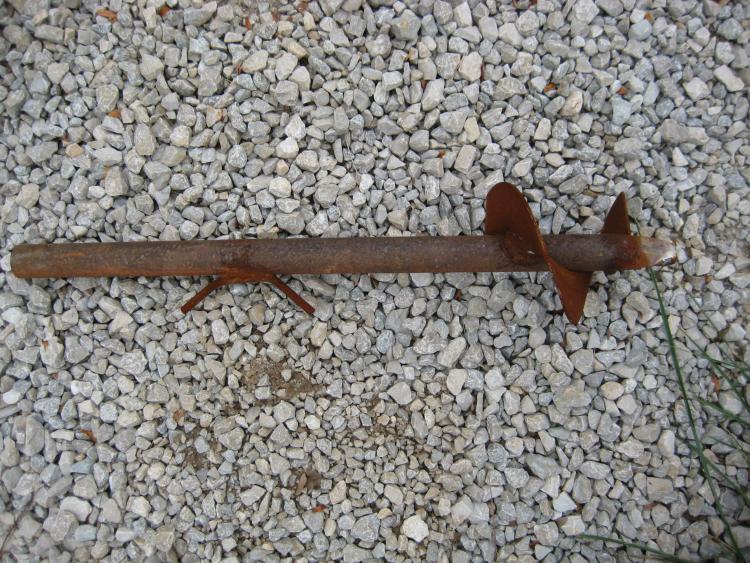
In this tunnel we have already laid plastic in the field and transplanted. By assembling the tunnel over the already formed beds we can use traditional tractor mounted bedshapers and transplanters, saving the need for specialized equipment. Here anchors are made from one inch diameter pieces of steel pipe 18 inches in length with a single turn of auger flight welded to the end. Photo credit: Tim Coolong, University of Kentucky
These anchors are placed on eight foot centers the entire length of the tunnel. Generally they are spaced 12 feet apart, which is enough to easily cover two beds made on six foot centers. Photo credit: Tim Coolong, University of Kentucky
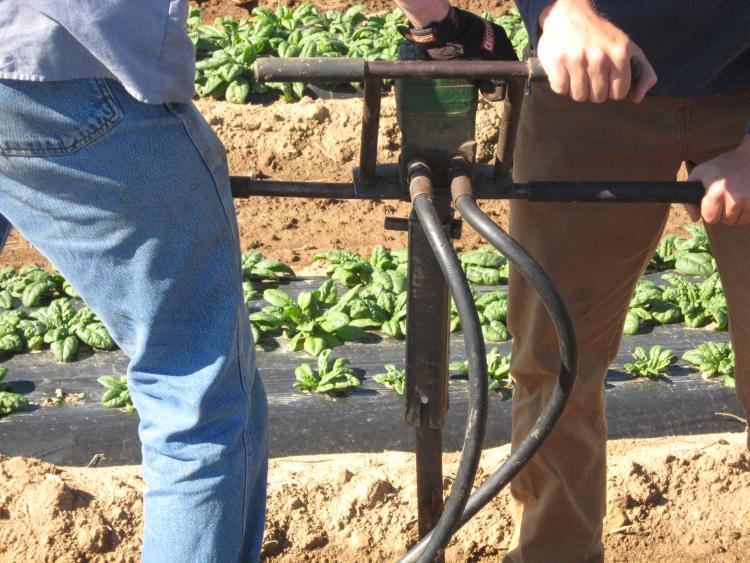
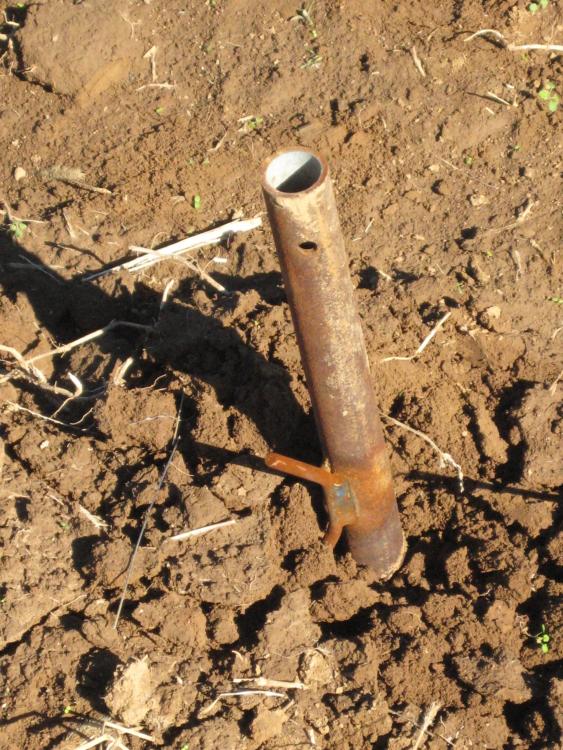
The anchors are then augured into the ground with a small hydraulic driven motor which can be hooked to a tractor. Anchors are driven into the ground so that the "hook" that is welded on the side is just at the soil level. Photo credit: Tim Coolong, University of Kentucky
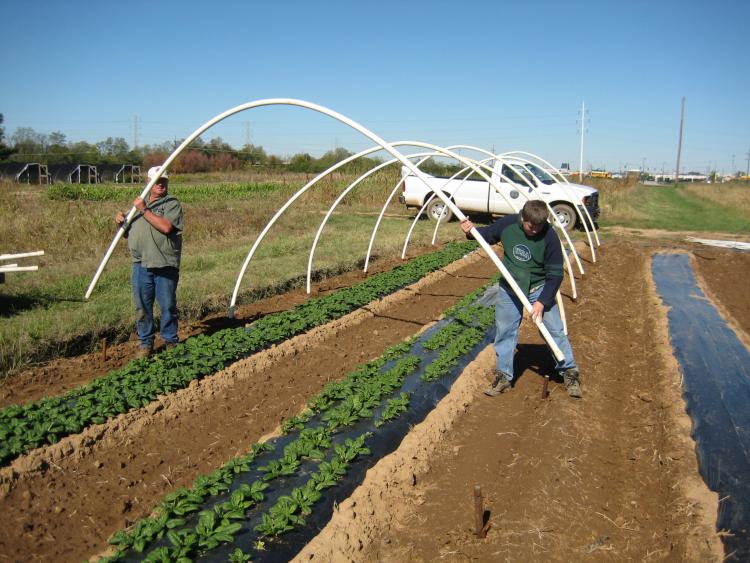
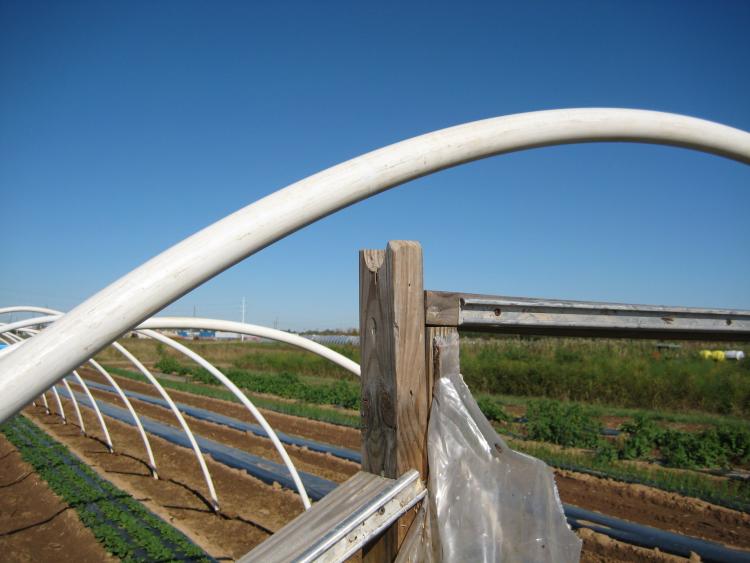
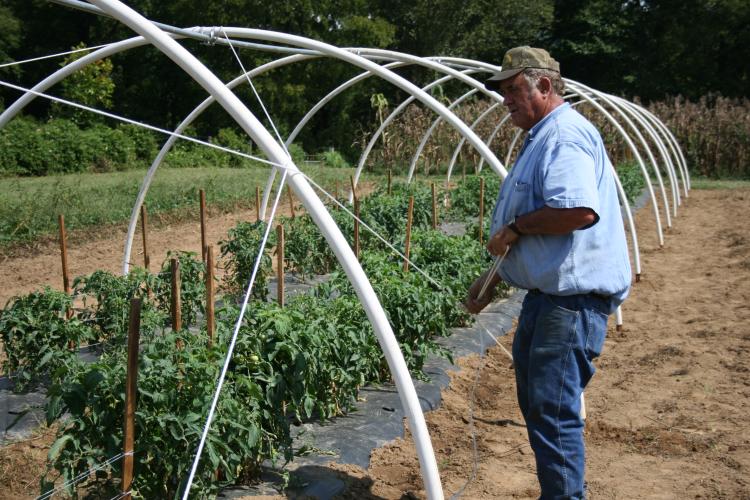
Then 1.5 inch schedule 40 pvc pipe is placed over the anchors. Typically pipe can be purchased in 20 foot lengths. A 20 foot pipe will form a tunnel 12 feet wide at the based with a center height of just over six feet. Pipes should be painted with a latex paint. Experience has shown that non-painted pipe may cause plastic to degrade where it comes in contact with the pipe. Photo credit: Tim Coolong, University of Kentucky
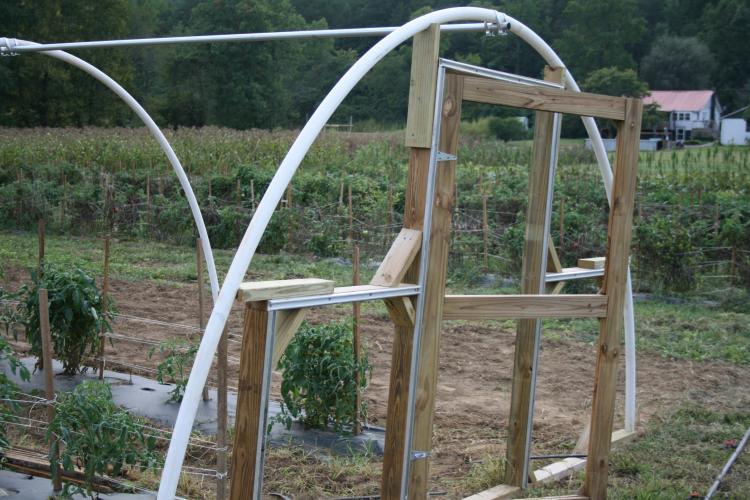
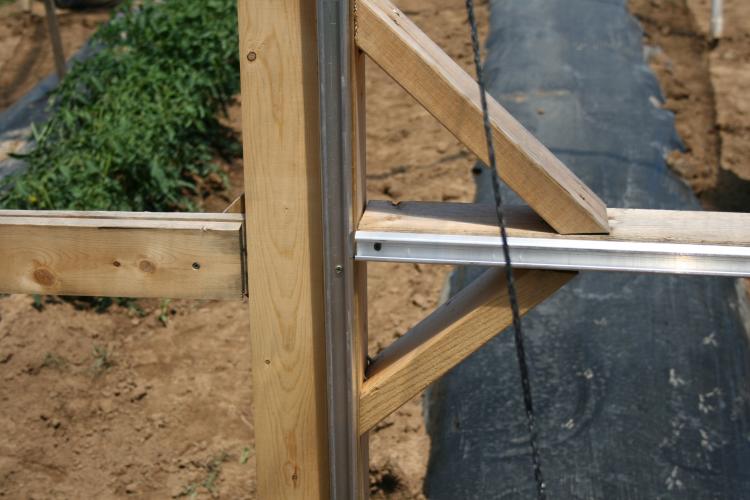
Endwalls were constructed the previous season. These are made from 2x4 lumber and have a number of aluminum channels attached to them for fastening plastic. They are quickly put in place and attached to the end loops. In addition, ropes are run from either side of the door to anchors that are sunk deep into the ground. Mobile home anchors are inexpensive and work well for this purpose. Photo credit: Tim Coolong, University of Kentucky

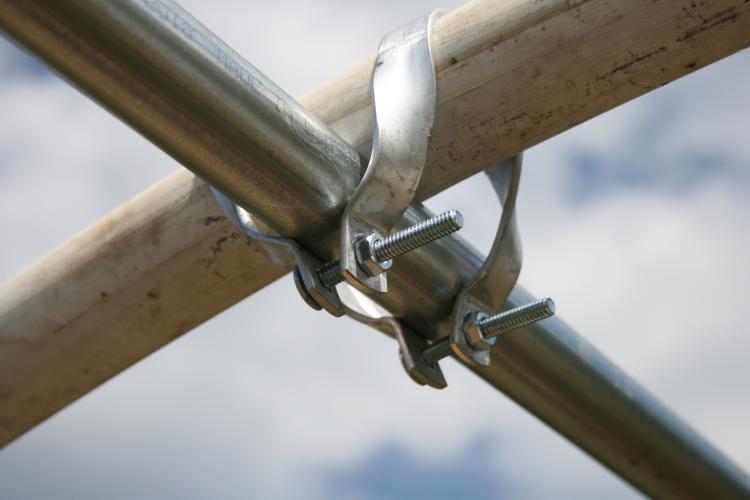
A lightweight metal pipe is then attached to each bow using aluminum cross connectors. A typical source of pipe would be the top rail for a chain link fence. This pipe is very important as it gives the entire tunnel rigidity. Demonstration plots showed that tunnels with the center pipe withstood very strong (60 mph) wind gusts while those without the pipe did not. The rigid pipe also helps shed water after rains. Photo credit: Tim Coolong, University of Kentucky
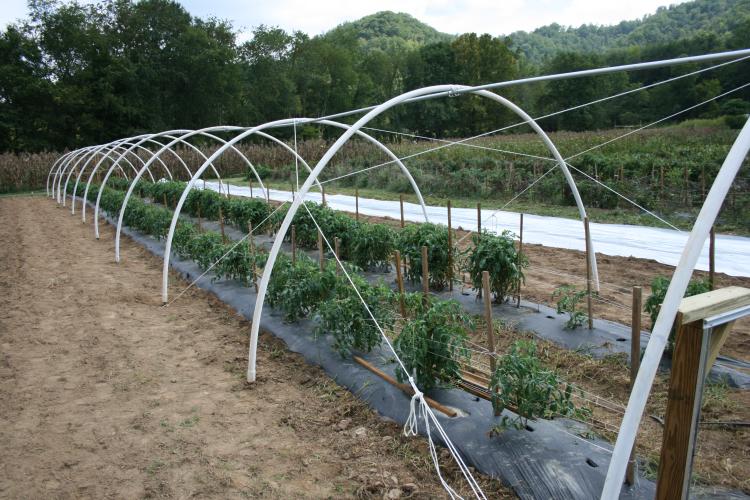
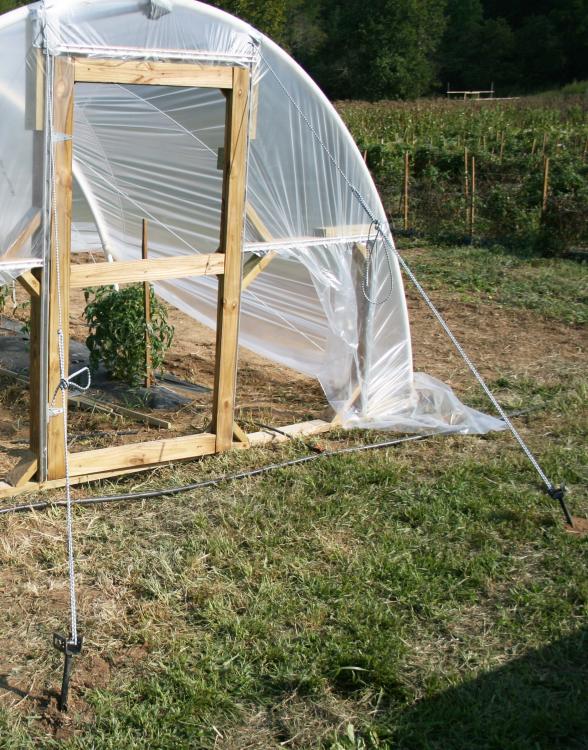
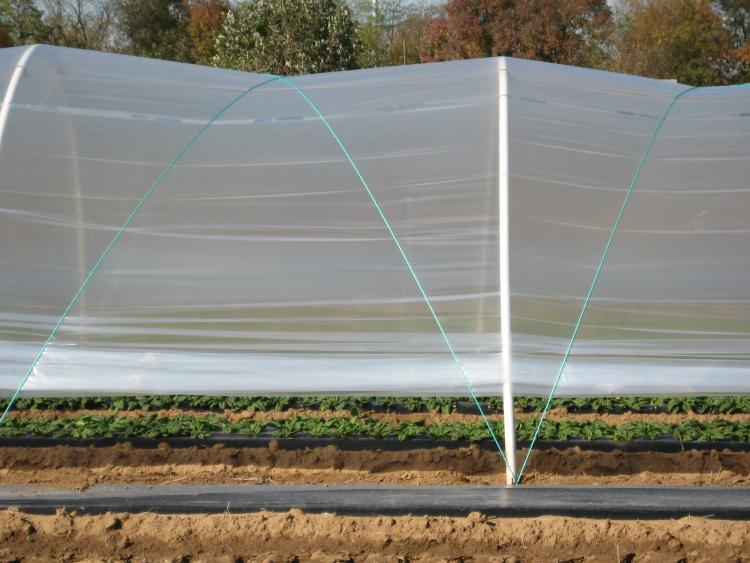
Ropes are then attached to anchors at each end and attached to the first three bows on either end in crisscross fashion. These ropes help tighten the tunnel and improve end-wall stability. Photo credit: Tim Coolong, University of Kentucky
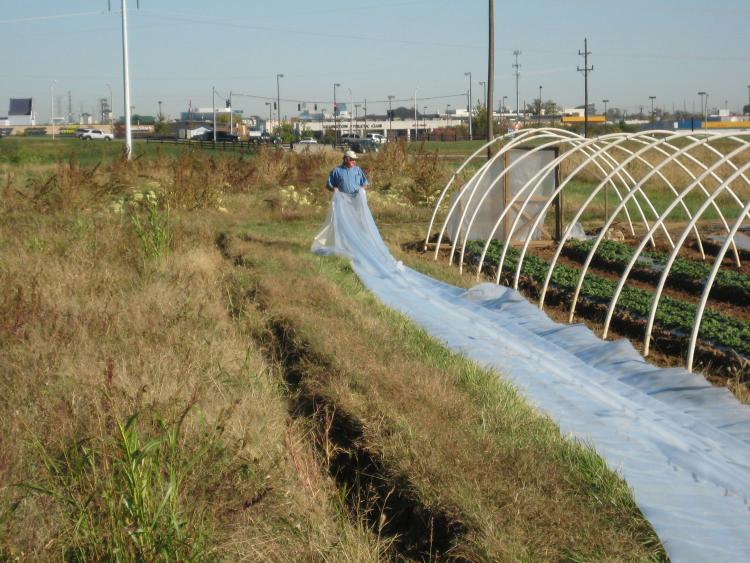
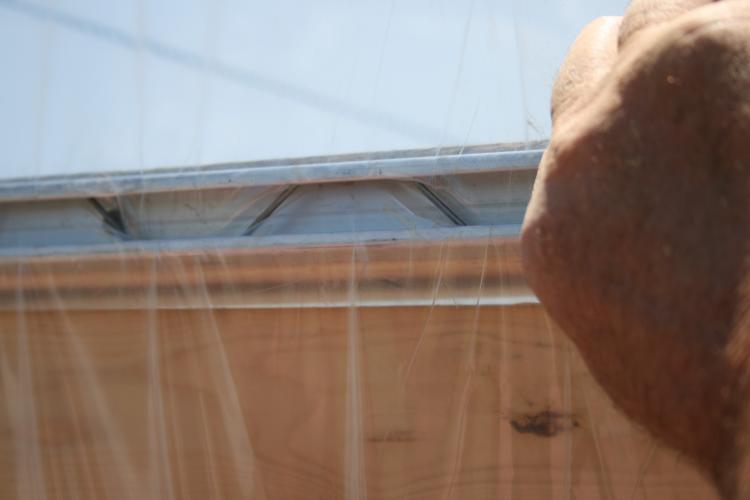
Plastic is then unrolled and pulled over the house. Because the plastic is meant to be removed during the winter months, a lighter weight (4 millimeter) plastic can be used if desired. However, 6 millimeter plastic has shown to be able to withstand wind to a much greater extent than 4 millimeter in central KY. Once pulled over the hoops, the ends of the plastic are attached to the endwalls using "wiggle wire" put into the pre-fastened channels (shown in the far right photo). Photo credit: Tim Coolong, University of Kentucky
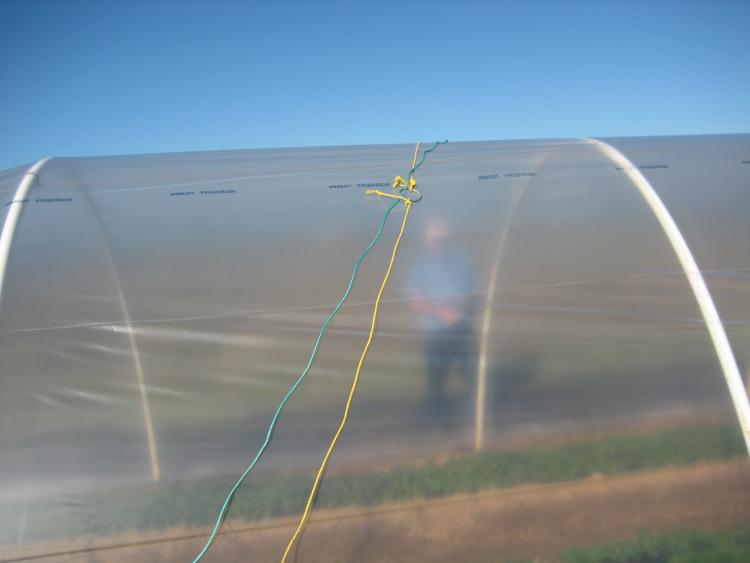
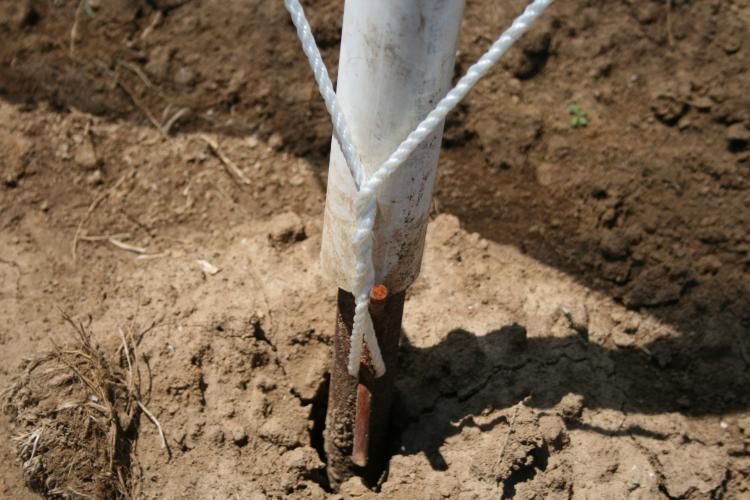
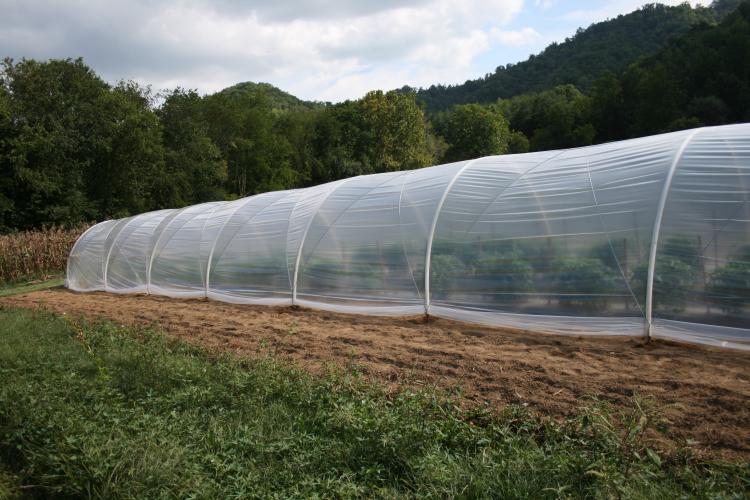
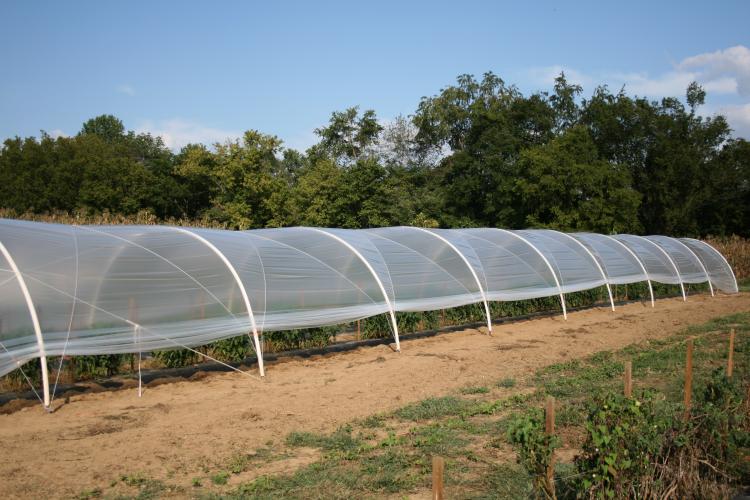
Then nylon rope is fed back and forth over the plastic attaching to the hooks that were welded on the side of the anchors. The rope is sent down the tunnel and attached to every other hook then it is brought back up the tunnel and attached to the remaining hooks. The rope is twisted at each hook so that the rope can be easily tightened as needed. By using the rope to hold the plastic cover down, one does not have to permanently affix the plastic to any base. Therefore when warm weather strikes the plastic can be pulled up on each side easily venting the crop inside. In fact, this type of structure was used to grow organic colored bell peppers during the summer in Lexington, KY. It served to keep rain off of the peppers, reducing fruit rot and the spread of bacterial spot of pepper. Photo credit: Tim Coolong, University of Kentucky
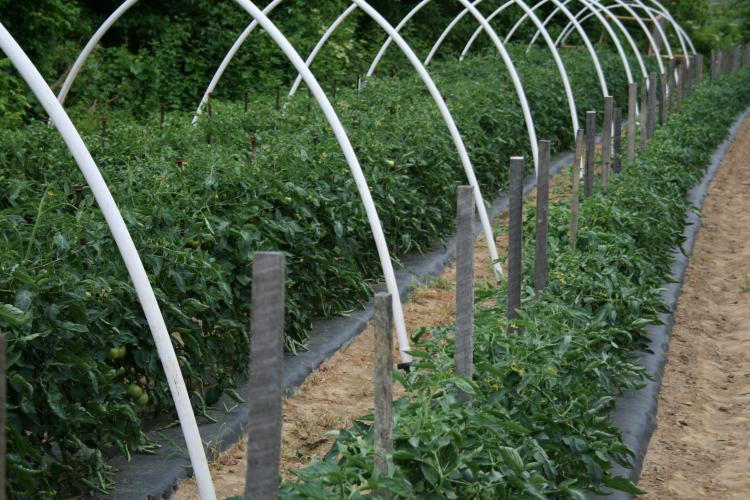
Total assembly time for a 160 foot long tunnel from start to finish can be done with 2-3 people in about 3-6 hours, depending on experience level. The end walls would take an individual about 2 hours each to build. While these tunnels only give about 2-3 oF of frost protection alone-more if an additional layer of plastic or remay is placed in the tunnel, they effectively increase the number of hours above 50 oF when used in spring. Thus they promote rapid growth and early fruit when used for tomatoes. Above is a picture taken on June 20, 2008, in the mountain region of East KY. The plastic had been removed, but one can easily see the difference in growth and fruit set on the tomatoes 'Mt. Crest' planted in the tunnel and those outside the tunnel. Both were planted on the same day in late April 2008. While not for everyone, these inexpensive tunnels can give growers a jump on the season without a large investment of capital. Photo credit: Tim Coolong, University of Kentucky